whoami
Example:
c:\>whoami
cmdline\administrator
whoami
Example:
c:\>whoami cmdline\administrator
Login to the PC as the Azure AD user you want to be a local admin. This gets the GUID onto the PC.
Log out as that user and login as a local admin user.
Open a command prompt as Administrator and using the command line, add the user to the administrators group. As an example, if I had a user called John Doe, the command would be “net localgroup administrators AzureAD\JohnDoe /add” without the quotes
Go to https://compliance.microsoft.com and sign in using an account that can assign permissions.
In the left pane of the Microsoft 365 compliance center, select Permissions.
On the Permissions & Roles page, under Compliance center, click Roles.
On the Compliance center roles page, select eDiscovery Manager.
On the eDiscovery Manager flyout page, do one of the following based on the eDiscovery permissions that you want to assign.
To make a user an eDiscovery Manager: Next to eDiscovery Manager, select Edit. On the Choose eDiscovery Manager wizard page, click  Add. Select the user (or users) you want to add as an eDiscovery manager, and then select Add. When you’re finished adding users, select Done. Then, on the Editing Choose eDiscovery Manager wizard page, select Save to save the changes to the eDiscovery Manager membership.
To make a user an eDiscovery Administrator: Next to eDiscovery Administrator, select Edit. On the Choose eDiscovery Administrator page, click Add. Select the user (or users) you want to add as an eDiscovery Administrator, and then Add. When you’re finished adding users, select Done. Then, on the Editing Choose eDiscovery Administrator wizard page, select Save to save the changes to the eDiscovery Administrator membership.
C:\Windows\System32\UserAccountControlSettings.exe
Powershell
Set-ItemProperty -Path registry::HKEY_LOCAL_MACHINE\SOFTWARE\Microsoft\Windows\CurrentVersion\Policies\System -Name EnableLUA -Value 0

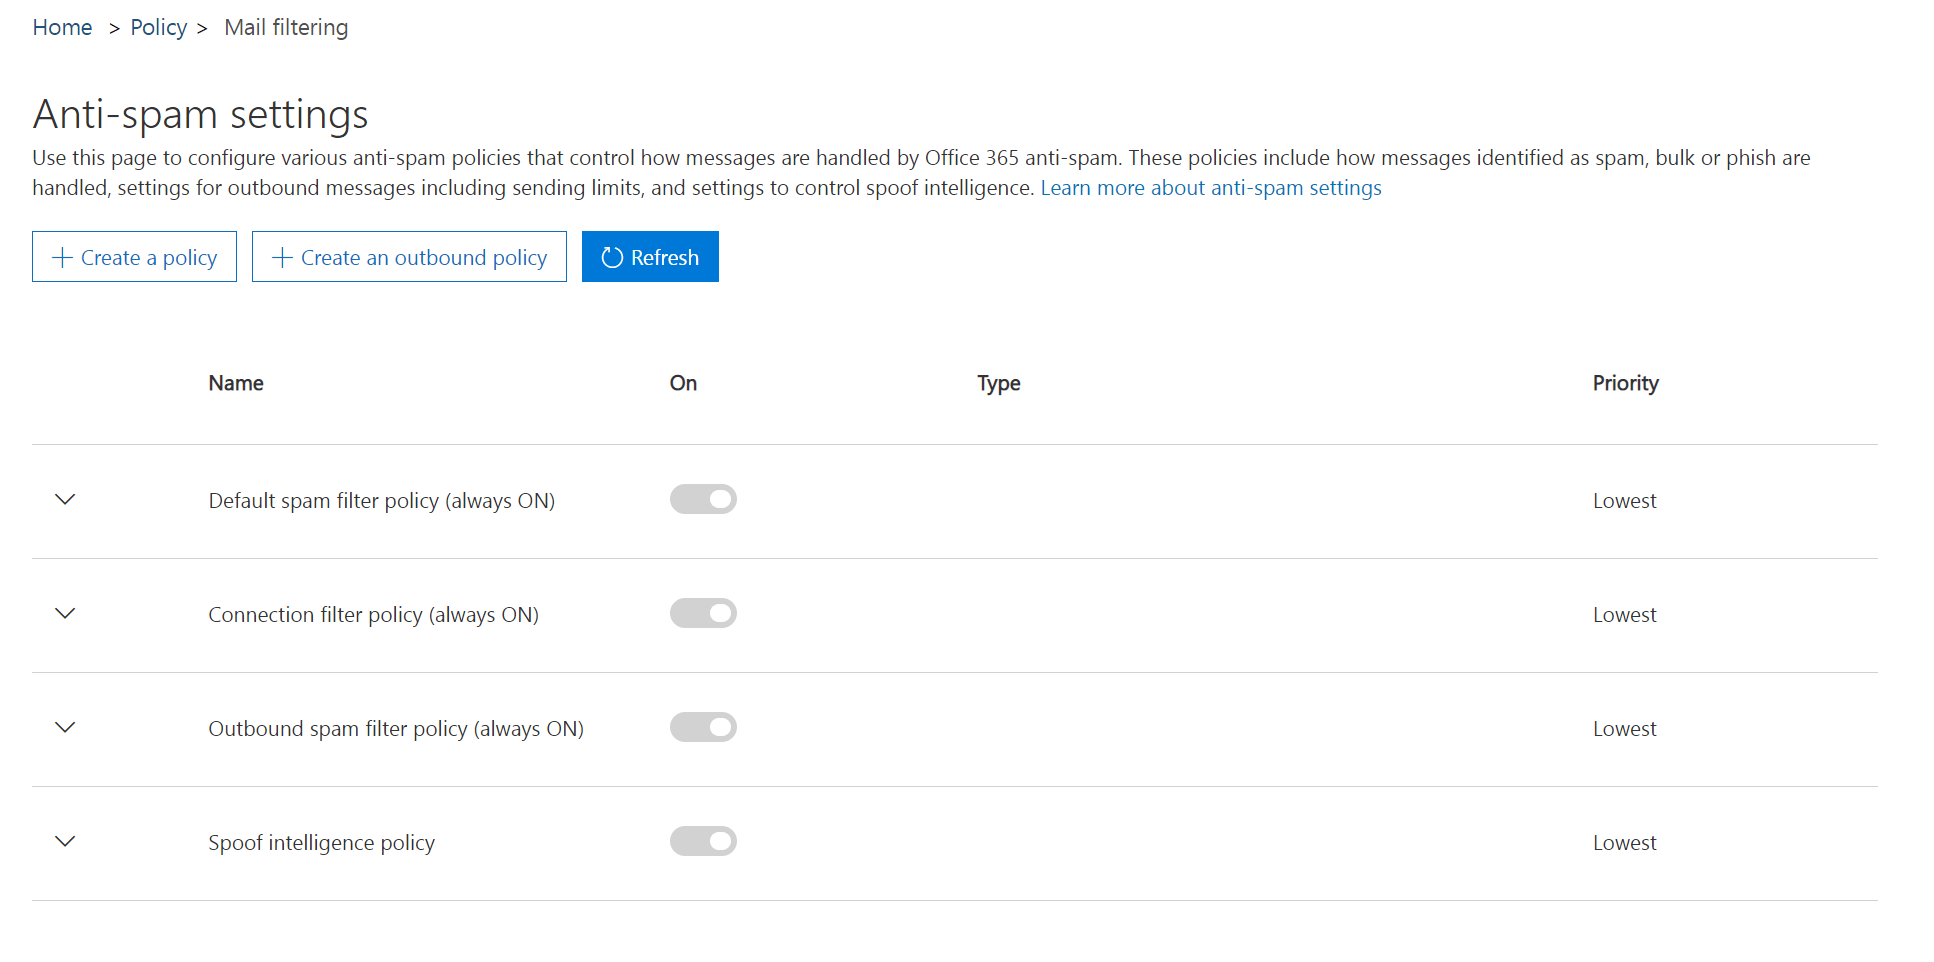


Log in to your Office 365 Security & Compliance portal for Microsoft 365 and choose Threat management > Anti-spam or head directly to the Anti-spam settings page here: https://protection.office.com/antispam
2Click the down arrow next to Outbound spam filter policy (always ON) and click the Edit policy button.

3Click the down arrow next to Automatic forwarding, then choose On – Forwarding is enabled from the dropdown. Click Save.

Default username and password
User: USERID
Password PASSW0RD
|
Managing security can be difficult with common identity-related attacks like password spray, replay, and phishing becoming more and more popular. Security defaults make it easier to help protect your organization from these attacks with preconfigured security settings:


